


How to Use an AeroPress for Beginners: Simple Steps
Table of Contents
- What You Need Before Your First AeroPress Brew
- AeroPress Recipe for Beginners: The Baseline Cup
- AeroPress Coffee Ratio: How Much Coffee and Water
- AeroPress Grind Size: Why Medium-Fine Works Best
- AeroPress Steep Time and Water Temperature
- Safe Pressing Technique and Pressure Guidance
- Troubleshooting by Taste: Fix Weak, Bitter, or Sour Coffee
- Cleaning, Storage, and Choosing Your Beans
- Frequently Asked Questions
Last Updated: October 9, 2026
What You Need Before Your First AeroPress Brew
Learning how to use an AeroPress for beginners comes down to one truth: an AeroPress for beginners is more forgiving than almost any other brew method. The AeroPress is a compact manual coffee press that pushes hot water through ground coffee using a plunger and a paper or reusable filter. It brews a single cup in about two minutes, and it costs far less than most electric machines.
Here at Velvet Pour Co., we field questions every week from home brewers who want café-style coffee without the café setup. This guide gives you one dependable baseline recipe, plus the fixes for when a cup tastes off.
Keep reading, and you'll be brewing a smooth, balanced cup on your first try.
AeroPress Parts and Setup at a Glance
Four parts do all the work:
- Chamber: the main tube that holds coffee and water
- Plunger: the rod and rubber seal that press down
- Filter cap: the screw-on lid that holds the filter
- Filters: paper discs (a few hundred come in the box) or a reusable metal disc
You also need a mug sturdy enough to press against. A 16-ounce mug gives you room to press without spilling.
AeroPress Recipe for Beginners: The Baseline Cup
Start with this recipe. It produces a rich, full-bodied cup close to espresso strength, which you can drink as is or top with hot water for a longer coffee.
Total time: about 3 minutes. Difficulty: beginner.
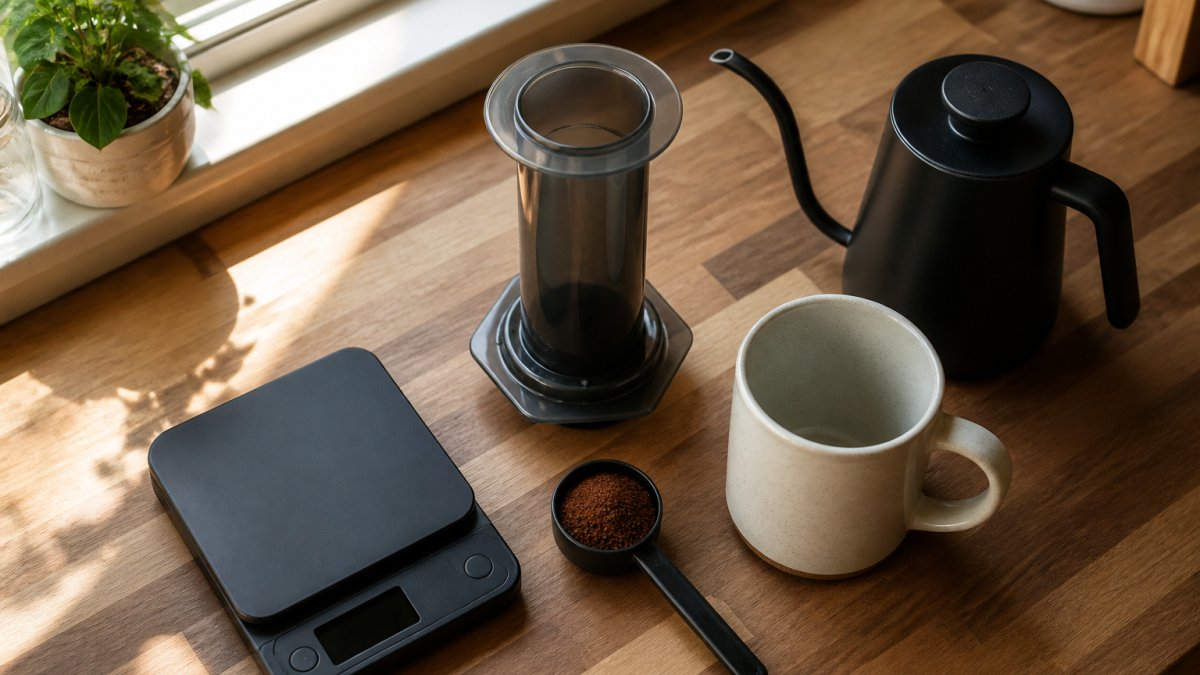
What you'll need:
- 16 grams of coffee (roughly 2 level tablespoons)
- 100 grams of water (about 3.5 ounces), just off the boil
- AeroPress, filter, and a 16-ounce mug
- A scale (helpful, not required)
Step-by-Step: From Grinding to Serving
- Insert the filter. Place a paper filter in the filter cap and rinse it with hot water. This removes papery taste and warms the cap.
- Assemble the chamber. Screw the filter cap onto the chamber and set it on your mug.
- Add coffee. Pour in 16 grams of medium-fine ground coffee and shake gently to level the bed.
- Pour water. Add 100 grams of hot water at about 195°F to 205°F. Pour in a slow circle.
- Stir once. Give the slurry a five-second stir to wet every ground.
- Steep. Wait one minute. This is your steep time.
- Press. Insert the plunger and push down slowly and steadily for about 30 seconds.
- Serve and clean. Pop out the coffee puck, rinse the parts, and enjoy.
For a longer drink, add hot water to your cup after pressing.
AeroPress Coffee Ratio: How Much Coffee and Water
The AeroPress coffee ratio that works best for beginners is 1:6 by weight: 16 grams of coffee to 100 grams of water. This gives a concentrated, flavorful cup you can dilute to taste.
| Style | Coffee | Water | Result |
|---|---|---|---|
| Concentrated | 16 g | 100 g | Espresso-like, bold |
| Standard cup | 16 g | 200 g | Balanced, medium body |
| Long cup | 16 g | 250 g | Lighter, tea-like |
No scale? Use 2 level tablespoons of ground coffee and fill the chamber to the top. It won't be exact, but it gets you close. Adjust the coffee dose by a gram or two next time if the cup tastes too strong or too weak.
AeroPress Grind Size: Why Medium-Fine Works Best
Medium-fine is the sweet spot for AeroPress grind size. It looks like table salt, finer than drip coffee but coarser than espresso.
Here's why it matters. Too coarse, and water runs through without pulling out much flavor, leaving a weak cup. Too fine, and the press becomes hard to push and the coffee turns bitter and muddy.
If you buy pre-ground coffee, look for a bag marked for espresso or fine drip. Whole beans give you control, and a burr grinder keeps the particles even. At Velvet Pour Co., our roasted-to-order coffees are available as whole bean or ground, so you can order the grind that matches your setup.
AeroPress Steep Time and Water Temperature
Two variables do most of the flavor work after grind: water temperature and steep time. Get a dependable starting point for each, then change only one at a time.
Start here: water at 200°F and a one-minute steep. That single combination pulls out sweetness and body without dragging out the harsh, bitter compounds that show up when water is too hot or the grounds sit too long.
Why temperature matters. Coffee extracts different compounds at different temperatures. Cooler water extracts the bright, fruity acids first and leaves the sugars and heavier body behind, so the cup tastes sour and thin. Hotter water extracts everything faster, including the bitter compounds, so the cup turns sharp and harsh. The 195°F to 205°F band is the sweet spot where sugars and acids come out together. Boiling water at 212°F sits above that band and can scorch the grounds.
Hitting 200°F without a thermometer. Boil your kettle, then let it sit. A common pattern is about 30 seconds off the boil for a full kettle, or up to a minute for a small one. If you have a thermometer, use it once to calibrate your ear and eye, then trust the wait time. If your kettle has a temperature setting, set it to 200°F and skip the guesswork.
Blonde Espresso Blend – Ground (12oz) →
Why steep time matters. Steep time is just extraction time. A one-minute steep is the baseline for the recipe above. Push it to two minutes and you get a heavier, more intense cup; cut it to 30 seconds and you get something lighter and brighter. The same bitter compounds that hot water pulls out fast also come out with a long steep, so a two-minute steep with 205°F water will taste noticeably harsher than a one-minute steep at 200°F.
A simple way to dial it in:
| If the cup tastes... | Try this first | Then this |
|---|---|---|
| Sour, sharp, thin | Raise water to 205°F | Steep 15-30 seconds longer |
| Bitter, harsh, drying | Lower water to 195°F | Cut steep to 45 seconds |
| Balanced but weak | Leave temp and time alone | Add 1-2 g more coffee |
Change one variable at a time. If you adjust temperature and steep time together, you won't know which one fixed the cup.
Safe Pressing Technique and Pressure Guidance
Press slowly and steadily, and stop when you hear a hiss. The whole plunge should take about 30 seconds.
Pressing hard doesn't make better coffee. It forces water through too fast and can push fine particles into your cup, which adds grit and bitterness. A gentle, even push does the job.
A few safety notes worth knowing:
- Keep the mug on a stable surface and press straight down, not at an angle.
- Hold the chamber steady with your other hand so it doesn't tip.
- Stop at the hiss. Pushing past it only adds bitterness.
If the plunger feels stuck, your grind is probably too fine. Back off and coarsen it next time.
Troubleshooting by Taste: Fix Weak, Bitter, or Sour Coffee
Your taste buds are the best diagnostic tool you have. Match the problem to the fix:
| Taste Problem | Likely Cause | The Fix |
|---|---|---|
| Weak, watery | Grind too coarse, or too little coffee | Grind finer, add 1-2 g more coffee |
| Bitter, harsh | Water too hot, or over-steeped | Lower temp to 195°F, cut steep time |
| Sour, sharp | Water too cool, or under-extracted | Raise temp, steep 15-30 seconds longer |
| Gritty | Grind too fine, pressed too hard | Coarsen grind, press more gently |
Change one thing at a time. If you adjust grind, temperature, and time all at once, you won't know which fix worked.
Cleaning, Storage, and Choosing Your Beans
Rinse the AeroPress parts in warm water after every brew, and give them a deeper wash once a week. The plunger seal lasts longer if you store the plunger and chamber apart rather than pressed together.
For beans, freshness beats everything. Coffee tastes best within a few weeks of roasting, and whole beans stay fresh longer than pre-ground. Store them in an airtight container away from light and heat, not in the fridge.
The roast level shapes what lands in your cup. Medium roasts give you balance and body, which suits the AeroPress well. Lighter roasts bring brightness and a cleaner finish. For a smooth, balanced everyday cup, our Velvet Daily Reserve is a medium roast built for exactly this kind of brewing. If you prefer something brighter, our Velvet Sunrise Blend is a light roast with a clean, refreshing finish.

For more on grind and roast basics, see the Specialty Coffee Association's brewing resources.
Once your baseline cup is consistent, try swapping beans before you change your technique. It's the fastest way to learn what you actually like.
Frequently Asked Questions
How long should coffee steep in an AeroPress?
For a beginner-friendly cup, aim for a steep time of about one minute after you finish stirring, then press for 20 to 30 seconds. That one-minute window is a dependable starting point, and you can adjust it later. A longer steep pulls out more flavor and body, while a shorter steep keeps the cup lighter and brighter. If your coffee tastes thin, add 15 seconds; if it tastes harsh or bitter, cut the steep time back.
Can I use regular ground coffee in an AeroPress?
Yes, but grind size matters more than the bag label. Pre-ground coffee sold for drip machines is usually too coarse, so the water runs through too fast and the cup tastes weak. If that is all you have, extend the steep time and stir a little longer. For the best results, buy whole beans and grind them medium-fine, roughly the texture of table salt. Velvet Pour Co.'s Velvet Daily Reserve, a smooth medium roast, works well for this.
Should beginners use the standard or inverted AeroPress method?
Start with the standard method. You set the filter cap and paper filter on your mug, add coffee and water, stir, steep, then press. It involves fewer steps and less risk of spills than the inverted method, where you brew upside down and flip the whole device before pressing. Once the standard method feels automatic, try the inverted version if you want a slightly fuller body and more control over steep time.
How do you clean an AeroPress after brewing?
Cleaning takes under a minute. Press the spent coffee puck and paper filter straight into the trash, then rinse the plunger, chamber, and filter cap under warm water. A quick wipe with a soft cloth removes most coffee oils. Every few weeks, wash the rubber seal with mild dish soap to keep it pliable. Let all parts air dry fully before you reassemble and store them, which keeps the seal in good condition for years.
Brewing a great cup shouldn't take a lab setup or a barista's training. The AeroPress rewards simple habits: a steady ratio, a medium-fine grind, and water just off the boil. Velvet Pour Co. roasts to order so your beans arrive fresh, with whole-bean and ground options, single-origin picks, and sampler packs if you want to explore. Shop now and find the roast that makes your morning cup worth waking up for.